Why does one garden path feel easy to follow at night while another looks like isolated fixtures? The difference often comes from planning. For buyers seeking LED pathway lighting solutions, installation involves more than placing lamps at equal intervals. It requires a route map, suitable fixture roles, cable planning, and a review of how the light serves visitors and staff.
Our practical installation sequence is specifically designed for commercial grounds including hotels, residential compounds, retail sites, and projects managed by landscape contractors and building-material distributors. We leverage our proven Lawn Lamp product applications to deliver site-specific lighting solutions, and our clear installation sequence helps purchasing teams confidently explain and justify their choices before placing an order.
Read the Site as a Working Route
Begin with a daytime walk-through. Mark gates, parking connections, steps, turns, driveway crossings, seating areas, planting beds, and service doors. Note slopes, drainage, irrigation lines, and places where mowing or digging may occur. These details show where a fixture can support movement without becoming an obstacle to landscape work.
Observe the route from several viewpoints. A guest approaching the entrance sees a different pattern from a maintenance worker beside a planting bed. Check nearby windows and signs. A light that seems balanced from above may appear distracting at eye level. These views give the installer a reference for testing.
Divide the garden into roles. One section may guide pedestrians. Another may frame a flower bed. A third may identify a gate or driveway edge. This zoning gives a distributor or designer a basis for discussing fixture roles with an owner.
Match Lawn and Spike Fixtures to Their Roles
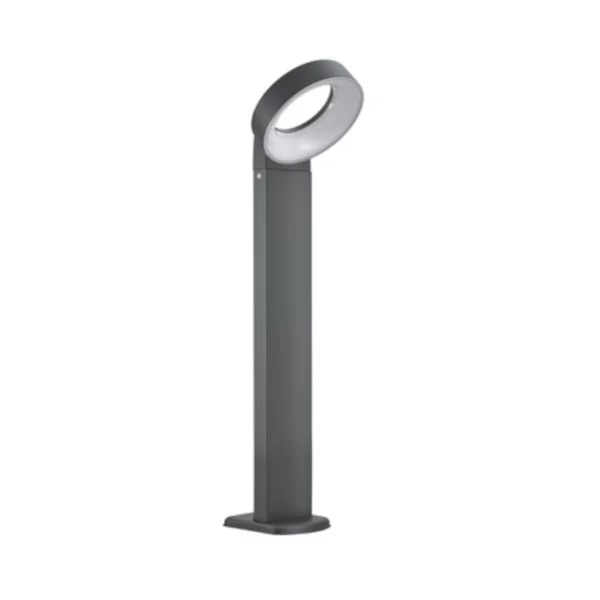
Our Lawn Lamp collection features durable aluminum fixtures designed specifically for lawns, garden edges, and small park green spaces. We also offer our Spike Lamp as an easy-install LED outdoor landscape lighting solution, perfect for illuminating pathways, flower beds, and scenic areas. These product lines support different applications: a freestanding marker for open zones and a spike-mounted accent for planting or edge definition.
Select the role before fixing the location. A lamp beside a walking line should reveal direction. A fitting in a flower bed can bring out texture or height differences. Near adriveway, the layout may clarify the boundary between pedestrian and vehicle movement. One garden can use several roles when their relationship stays consistent.
An outdoor bollard lights layout can suit a project that needs visible vertical markers along a route. Review the form beside shrubs, paving, and walls. A lower visual profile may sit more quietly within planting, while a stronger marker can help define an open gate or lawn. The final position should follow the site plan rather than a fixed spacing habit.
Establish Spacing from Sightlines
There is no single spacing pattern for every garden. Begin at turns, steps, and intersections, where direction changes need visual support. Then review the intervals. A regular rhythm can help the eye follow the route, while excessive repetition may make a small courtyard feel crowded.
Surrounding brightness should shape the layout. A dark lawn and a bright storefront create different visual conditions. Place samples at the proposed height and walk the path from both directions. Look for dark gaps, reflected glare, and areas where the focal point is unclear.
For a commercial project, record the arrangement on a simple plan. Include fixture role, orientation, nearby features, and viewing direction. The document helps a contractor repeat the layout and confirm fixture types and quantities.
Prepare the Ground and Connection Route
Before installation, confirm ground condition and the cable path. Keep connections away from likely digging or mowing areas. Check drainage and avoid places where water may collect. The electrician should follow local requirements for cable protection, power connection, and testing.
For spike-mounted products, press the stake into stable ground rather than using the fixture body as a hammering point. Aim the fitting after the soil settles. For other lawn fixtures, keep the base clear of foot traffic and landscape equipment. A location plan helps trades coordinate.
We provide aluminum outdoor lighting with a quality finish, replaceable LED chips and drivers, and an interchangeable lamp head. These features make access worth considering. Leave a way to reach the fitting and connection without disturbing nearby planting or paving.
Test the Route After Sunset
Install fixtures according to the approved plan. Keep path lighting aligned with walking direction and aim accents toward the intended planting or surface. Check each fitting from normal eye level. A small angle change can shift attention from a tree to a wall or from a path to a nearby window.
Testing after sunset reveals issues that daylight cannot show. Walk as a guest, then inspect staff routes. Look for glare, uneven transitions, and shadows at steps or turns. If a fitting feels too prominent, adjust its position or orientation before final approval.
Take approval photographs from the driveway, entrance, and walking line. Label each image with category and location. These records help designers, installers, and buyers refer to the same result across several gardens or sites.
Complete a B2B Handover File
Garden growth changes the scene. Branches can block light, mulch can cover a base, and irrigation work can disturb a cable route. Include fixture locations, cable paths, and cleaning notes in the handover file. Facility teams can inspect a zone without searching the whole property.
Our Lawn Lamp range is designed specifically for outdoor paths, lawns, flower beds, and scenic areas, providing versatile lighting solutions for diverse commercial landscape projects. Our products can be provided with relevant certificates, detailed 2D drawings, high-definition images, instruction manuals, and warranty support according to project requirements. These comprehensive resources support thorough quotation review and smooth after-sales communication.
The installation logic is practical: study the route, assign roles, set spacing from sightlines, prepare connections, test after dark, and document the result. At Keyida, we work with lighting retailers, building-material distributors, designers, and project owners seeking outdoor path lights. We support OEM or ODM discussions and provide product information for review, helping projects select a suitable combination of lawn and spike fixtures.